提示
本文时间较为久远,不建议按照文中方法进行设置,闲来无事读读即可。
# 前言
前段时间我盯上了一个网站,想要爬下其中的一些数据,于是就想到来学学 Python 爬虫。网上学习资源一大堆,倒不用费多大神,可是 Python 环境得自己配置,于是我就踏上了这趟配置 Python 环境的「艰辛」之路,因此也就有了此文。
事实上我的电脑是安装过 Python 的,并且有三个不同的版本,分别是 macOS 系统自带的 Python 2.7.10,我自己安装的 Python 3.x.x,以及 Anaconda 里的 Python 3.7.1。
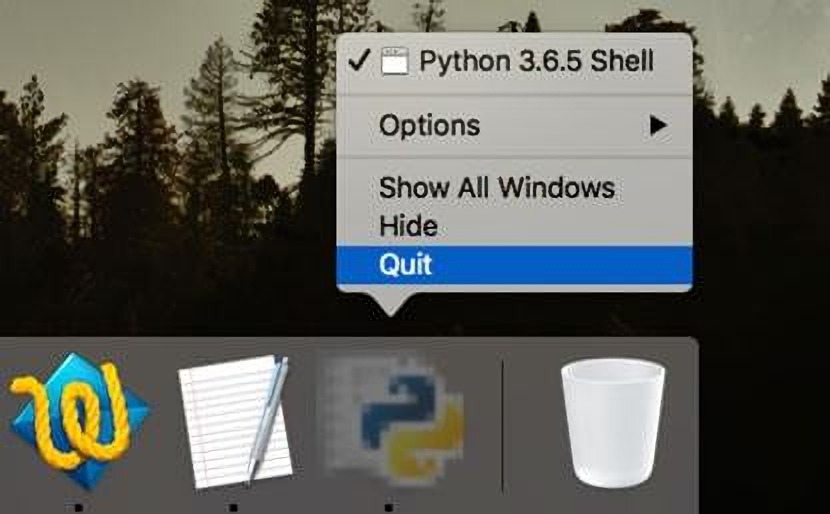
可是重度强迫症的我嫌弃原先我自己安装的那个 Python 3 版本 bug 太多(主要是自带 IDLE 打开后在程序坞中 icon 会变模糊,不能忍受。),就像下图这样,于是就想要卸载了再重新安装一个其他的版本。
# 卸载 Python 3
上网搜索一下,完整地卸载 Python 3 并不困难。参考 Python 官方文档,打开终端(Terminal),依次按照以下 6 步操作即可。
- 查看 Python 版本
python3 --version
- 删除框架
sudo rm -rf /Library/Frameworks/Python.framework/Versions/3.x.x #3.x.x 为需要卸载的 Python 版本
- 删除应用目录
cd /Applications
sudo rm -rf Python\ 3.x.x
2
- 删除目录连接
进入目录 /usr/local/bin/,找到以下文件(3.x.x 替换为需要卸载的相应版本),全部删除。
➜ bin rm pydoc3
➜ bin rm pydoc3.x.x
➜ bin rm python3
➜ bin rm python3-config
➜ bin rm python3.x.x
➜ bin rm python3.x.x-config
➜ bin rm python3.x.xm
➜ bin rm python3.x.xm-config
➜ bin rm pyvenv
➜ bin rm pyvenv-3.x.x
➜ bin rm pip3
➜ bin rm pip3.x.x
➜ bin rm 2to3
➜ bin rm 2to3-3.x.x
➜ bin rm easy_install-3.x.x
➜ bin rm idle3
➜ bin rm idle3.x.x
2
3
4
5
6
7
8
9
10
11
12
13
14
15
16
17
- 删除环境路径
vi ~/.bash_profile
- 确认 Python 是否已删除
python3
若输出结果是 -bash: python3: command not found[1],则表示删除成功。
# 卸载 Anaconda
删除完 Python 后,在终端中输入 python3 --version 仍然还是 3,而不是 2。想了半天才明白过来这个 Python 3 是 Anaconda 里的,此时 Python 代码也是可以正常运行的,因为调用的是 Anaconda 中的 Python。并且由于 Anaconda 预先安装了很多的的常用库(packages),就不需要再使用 pip 命令自己再安装第三方库了。
于是就打算不安装 Python 3,只用 Anaconda 吧,但是因为 Anaconda 是好久之前安装的,版本有点旧,我又强迫症犯了,想要删除 Anaconda,重新用 Homebrew 安装最新版 Anaconda,因为 Homebrew 安装 Anaconda 后,升级、卸载等非常方便。
查阅 Anaconda 官方文档,发现卸载 Anaconda 居然如此简单,只需一行代码:
rm -rf ~/anaconda3
即可卸载完成!
如果需要更加干净地删除,可以按照说明文档中的 Option B 进行操作,不过由于我还要再安装,上面这行代码就可以了,至少超过 4 个 G 的文件夹 anaconda3 已经被我删除掉了。
# Homebrew 安装 Anaconda
- 首先需要安装 Homebrew,在终端中输入:
/usr/bin/ruby -e "$(curl -fsSL https://raw.githubusercontent.com/Homebrew/install/master/install)"
即可安装 Homebrew,然后执行命令 brew tap caskroom/cask 获取 Homebrew Cask[2]。由于之前我已经安装过,这一步就省略了。
- 通过 Homebrew 安装 Anaconda
有了 Homebrew 后,在终端中输入:
brew cask install anaconda
即可安装 Anaconda,然后就只需要保持网络稳定,等着它自动下载。
➜ brew cask install anaconda
.
.
.
PREFIX=/usr/local/anaconda3
.
.
.
🍺  anaconda was successfully installed!
2
3
4
5
6
7
8
9
- 配置 Sublime Text 3 和 Visual Studio Code
Sublime Text 3 和 Visual Studio Code(以下简称 VS Code)是两个超级棒的文本编辑器,颜值高、启动速度快、占用内存小、插件丰富…… 我一直用它们写
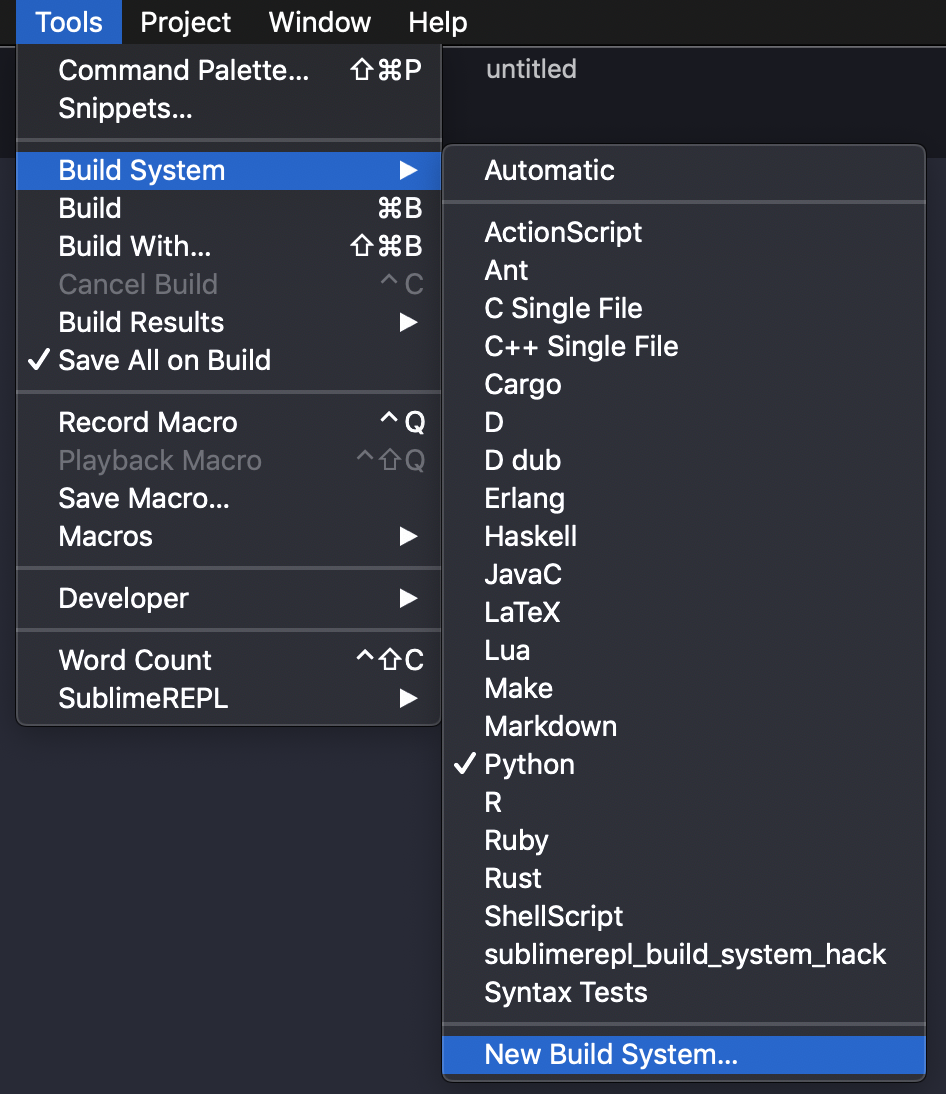
- Sublime Text 3
依次点击 Tools -> Build System -> New Build System(下图中的 Python 是已经设置好之后的)
在弹出的编辑页面,输入以下代码,然后保存。
{
    "cmd": ["~/anaconda3/bin/python", "-u", "$file"],
    "file_regex": "^[ ]*File \"(...*?)\", line ([0-9]*)",
    "selector": "source.python"
}
2
3
4
5
按道理应该就可以了,但是我是试了多次后依然不行。在终端中输入 python3 也显示 command not found,说明 Anaconda 并没有被识别。上网搜索一番,发现是 Anaconda 没有配置环境路径(environment path),导致 Sublime Text 3 不能使用 Anaconda 中的 Python 作为解释器,这可能是由于我使用 Homebrew 安装 Anaconda 导致的。
我在网上没有找到很好的解决方法,其中 Medium 上这篇 文章 比较靠谱,但是我按照文章中的方法依然没有解决,可能是我操作不对。
- VS Code
此处 VS Code 面临与 Sublime Text 3 同样的问题,就没有往下进行了。
正当陷入困境,此时想到:
重装
重启/装大法好!
哈哈哈,那就删了重来吧!
# 再卸载 Anaconda
由于这次使用 Homebrew 安装的 Anaconda,因此卸载就相当方便了,直接在终端中输入:
brew cask zap anaconda
就可以删除一堆 Anaconda 相关文件,还会删除几个空的目录。
# 再次下载 Anaconda
再次到 官网 下载 Anaconda(也可到 清华大学开源软件镜像站 下载,会快一些),等待十几分钟下载好之后,再次进入常规安装界面,按照步骤安装好之后,接着来调教 VS Code 和 Sublime Text 3。
- 配置 VS Code
打开 Preference(⌘+,),在上方搜索框输入「settings.json」,点击第一个 Edit in settings.json,在编辑界面中输入:
{
 "python.pythonPath": "~/anaconda3/bin/python.app"
}
2
3
即可指定 VS Code 的 Python 解释器路径,当然也可以包括其他的一些设置,基本的一些配置如下:
{
// Python
  // path
"python.pythonPath": "~/anaconda3/bin/python.app"
// configurations
"configurations": [
  {
      "name": "Python: Current File",
      "type": "python",
      "request": "launch",
      "program": "${file}",
      "pythonPath": "${config:python.pythonPath}"
  }
],
}
2
3
4
5
6
7
8
9
10
11
12
13
14
15
16
- 配置 Sublime Text 3 交互式解释器
Sublime Text 3 并没有预先设置 Python 交互式解释器,需要安装插件「SublimeREPL」实现。
点击 ⌘+⇧+p,呼出命令面板,输入 install package,选择它。
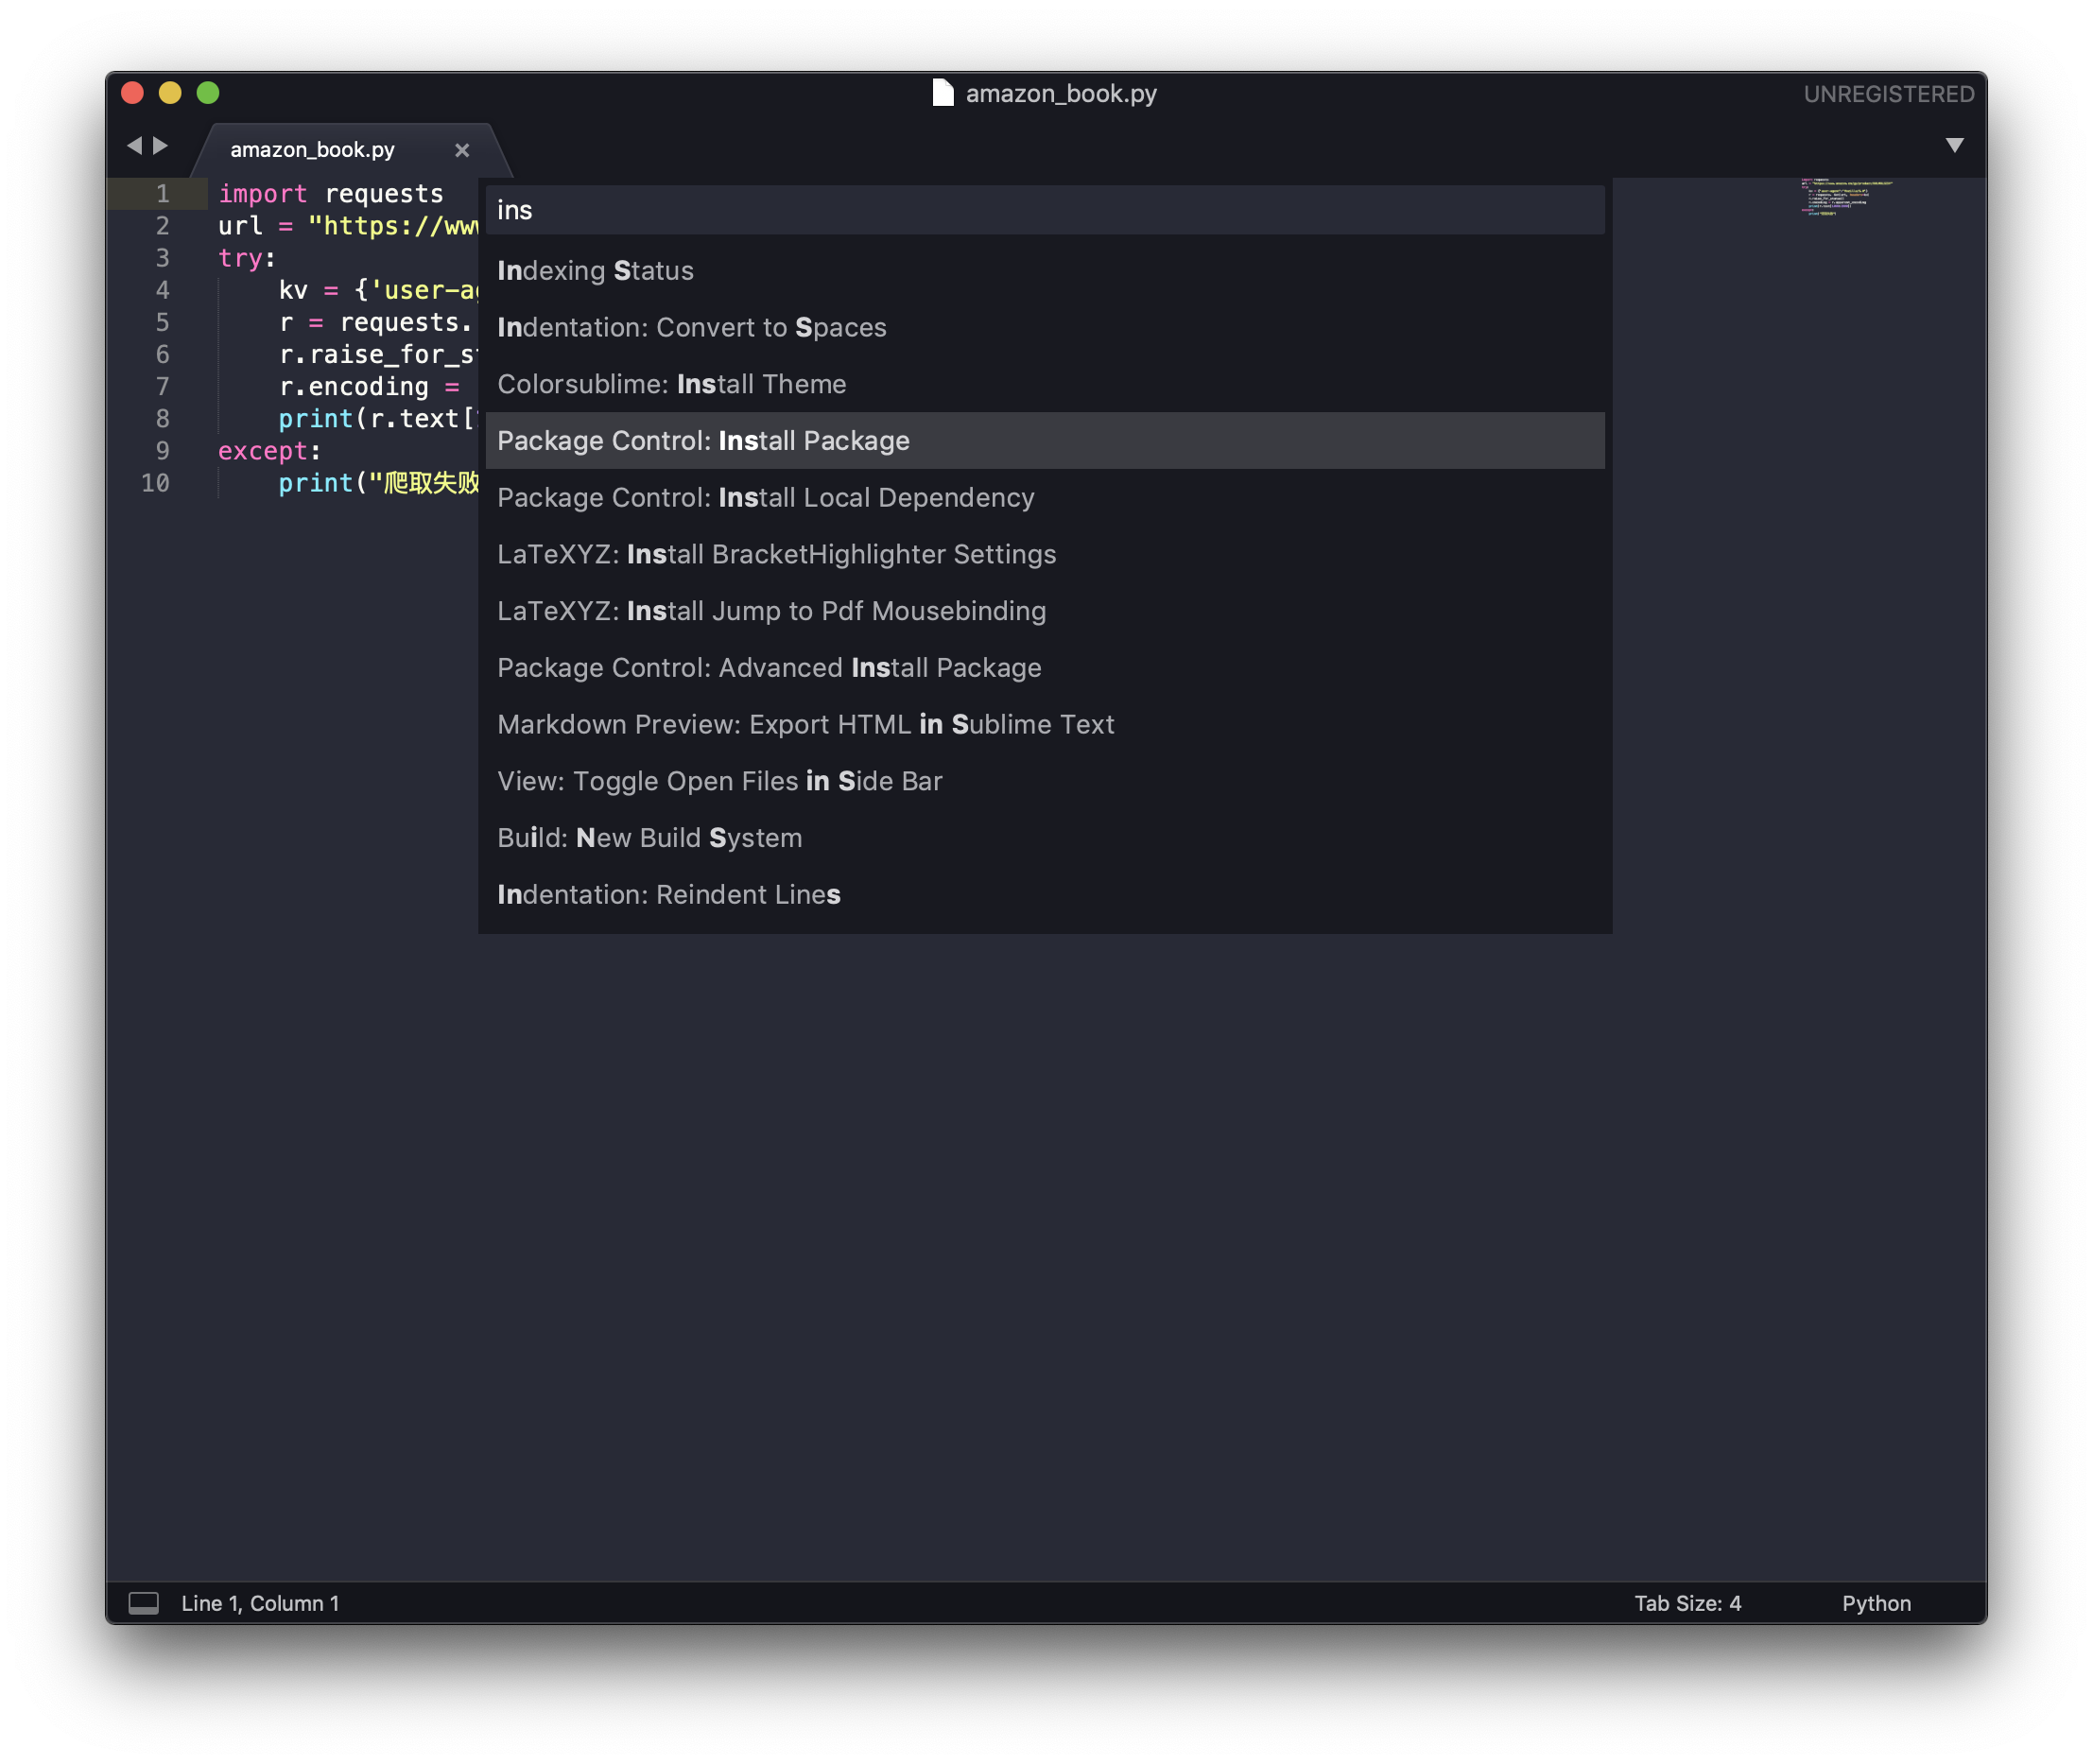
接着输入「SublimeREPL」,点击之后就安装了该插件。试一下!
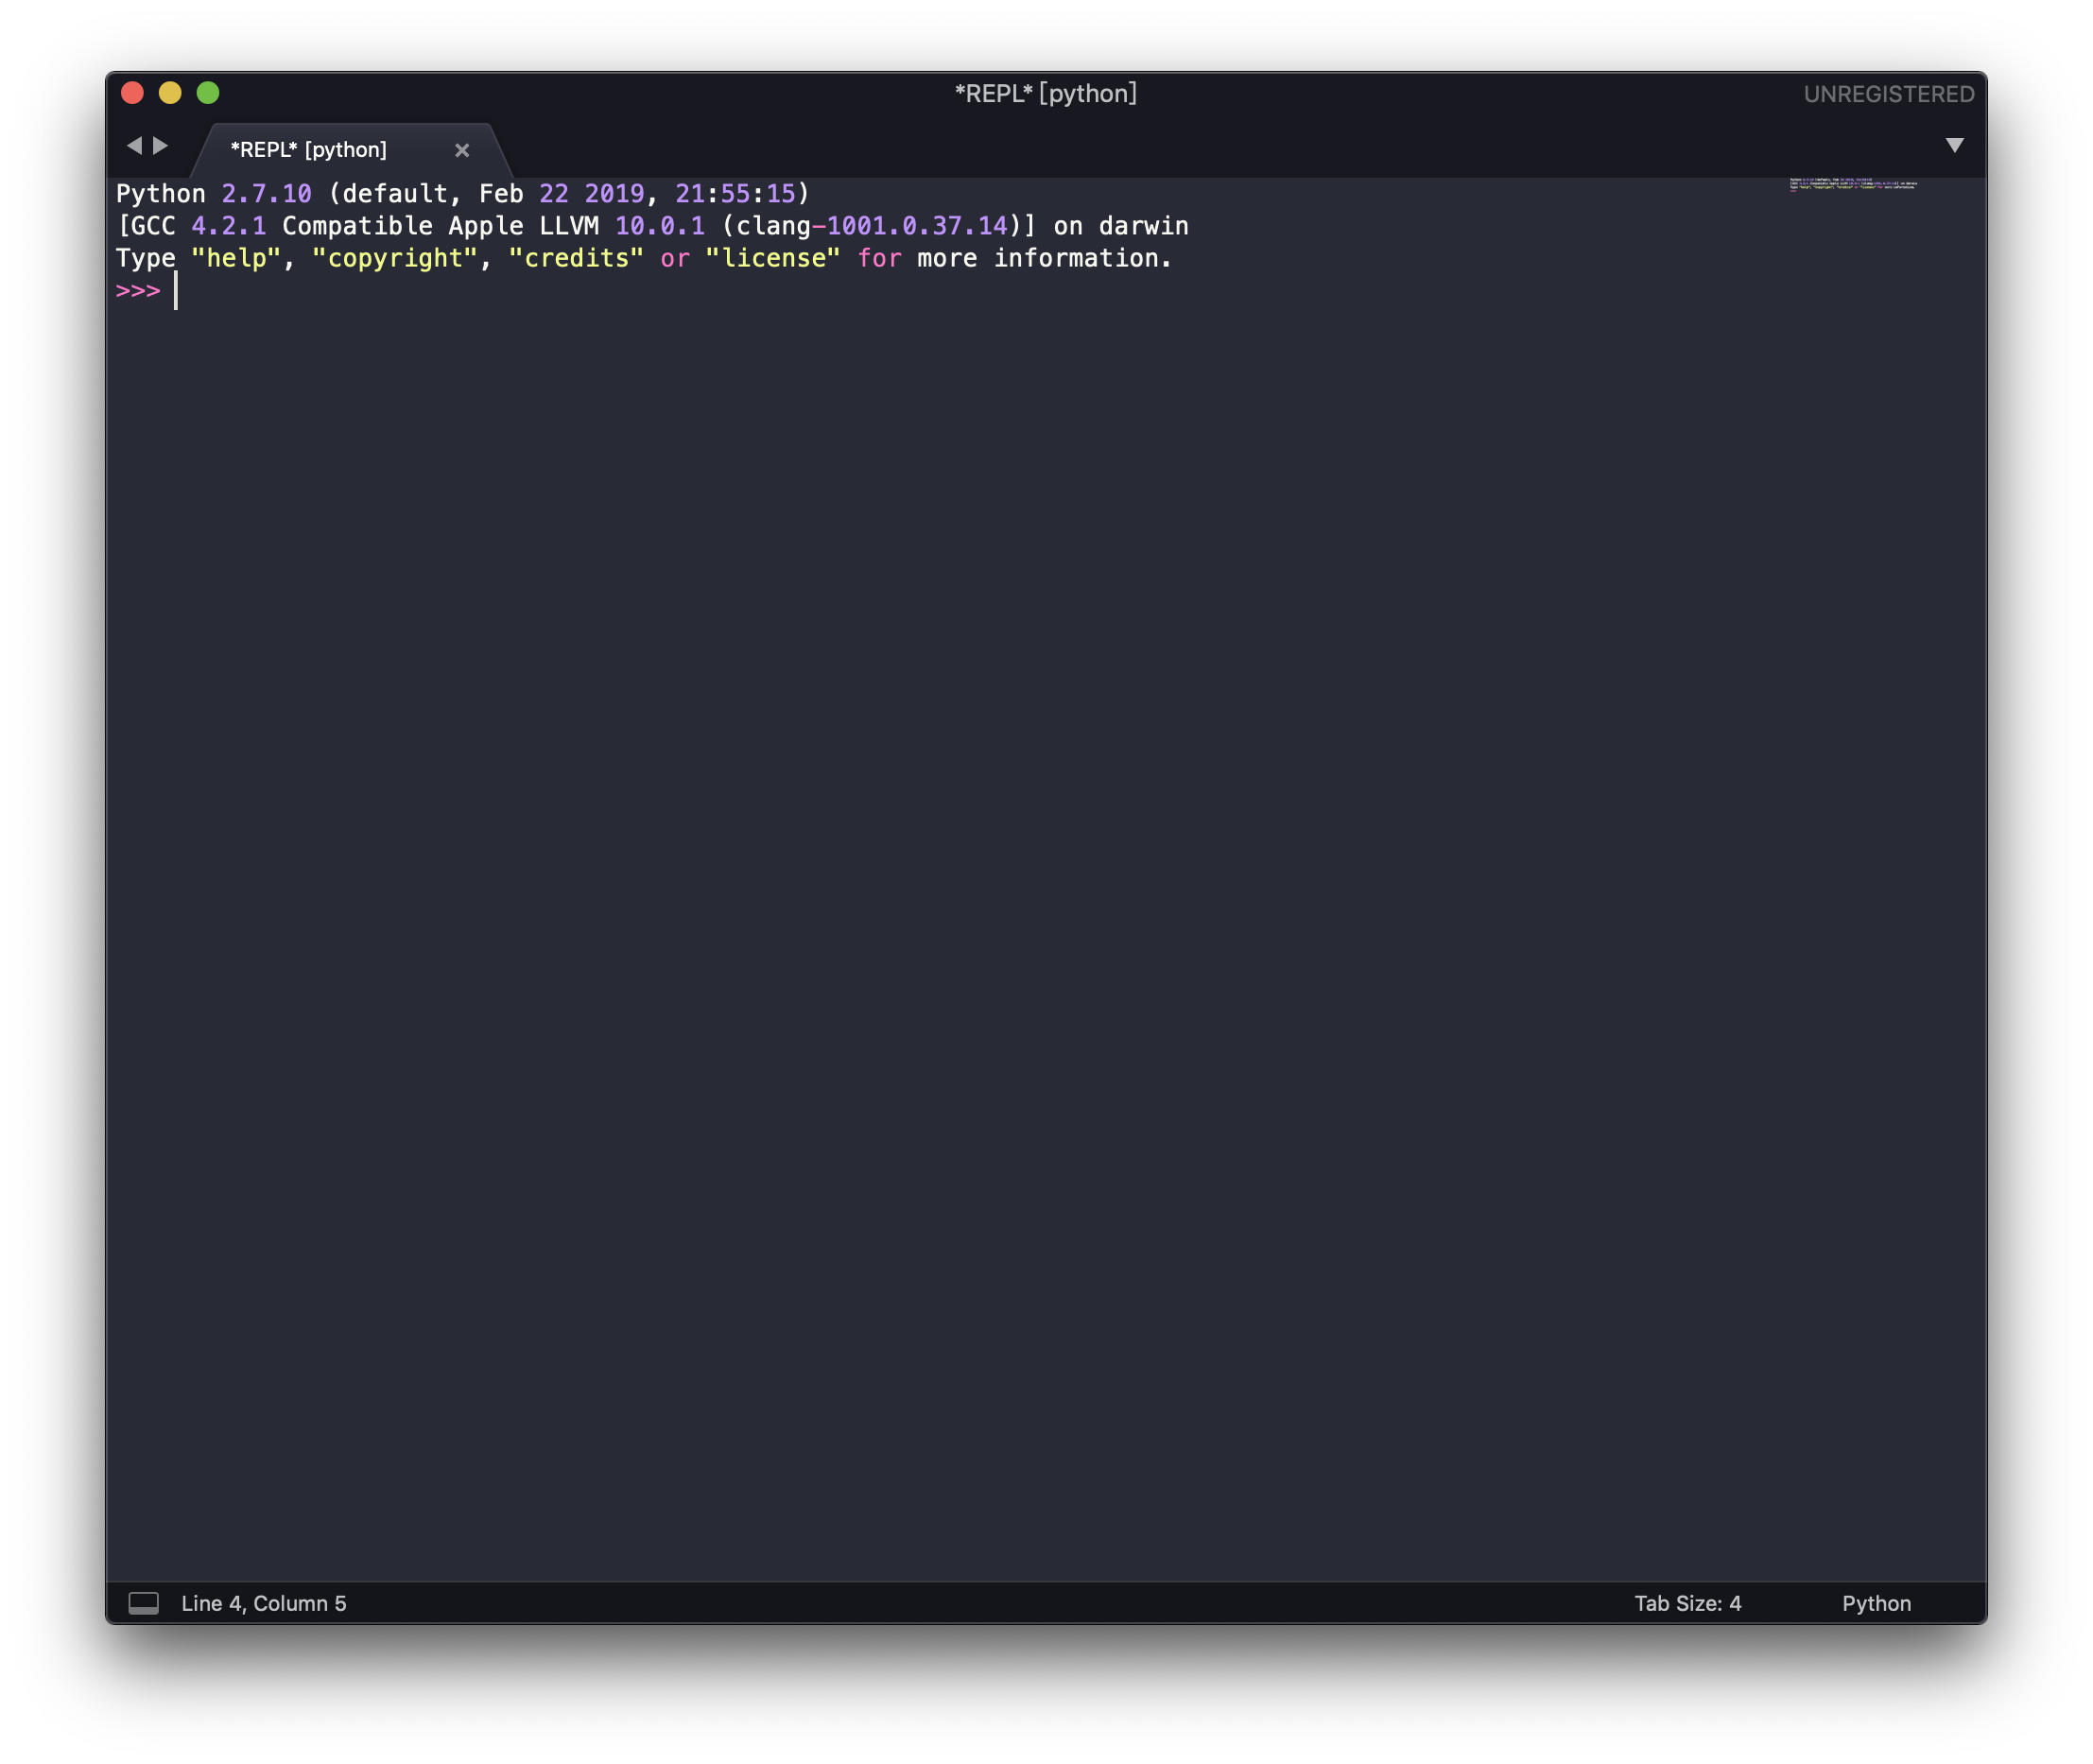
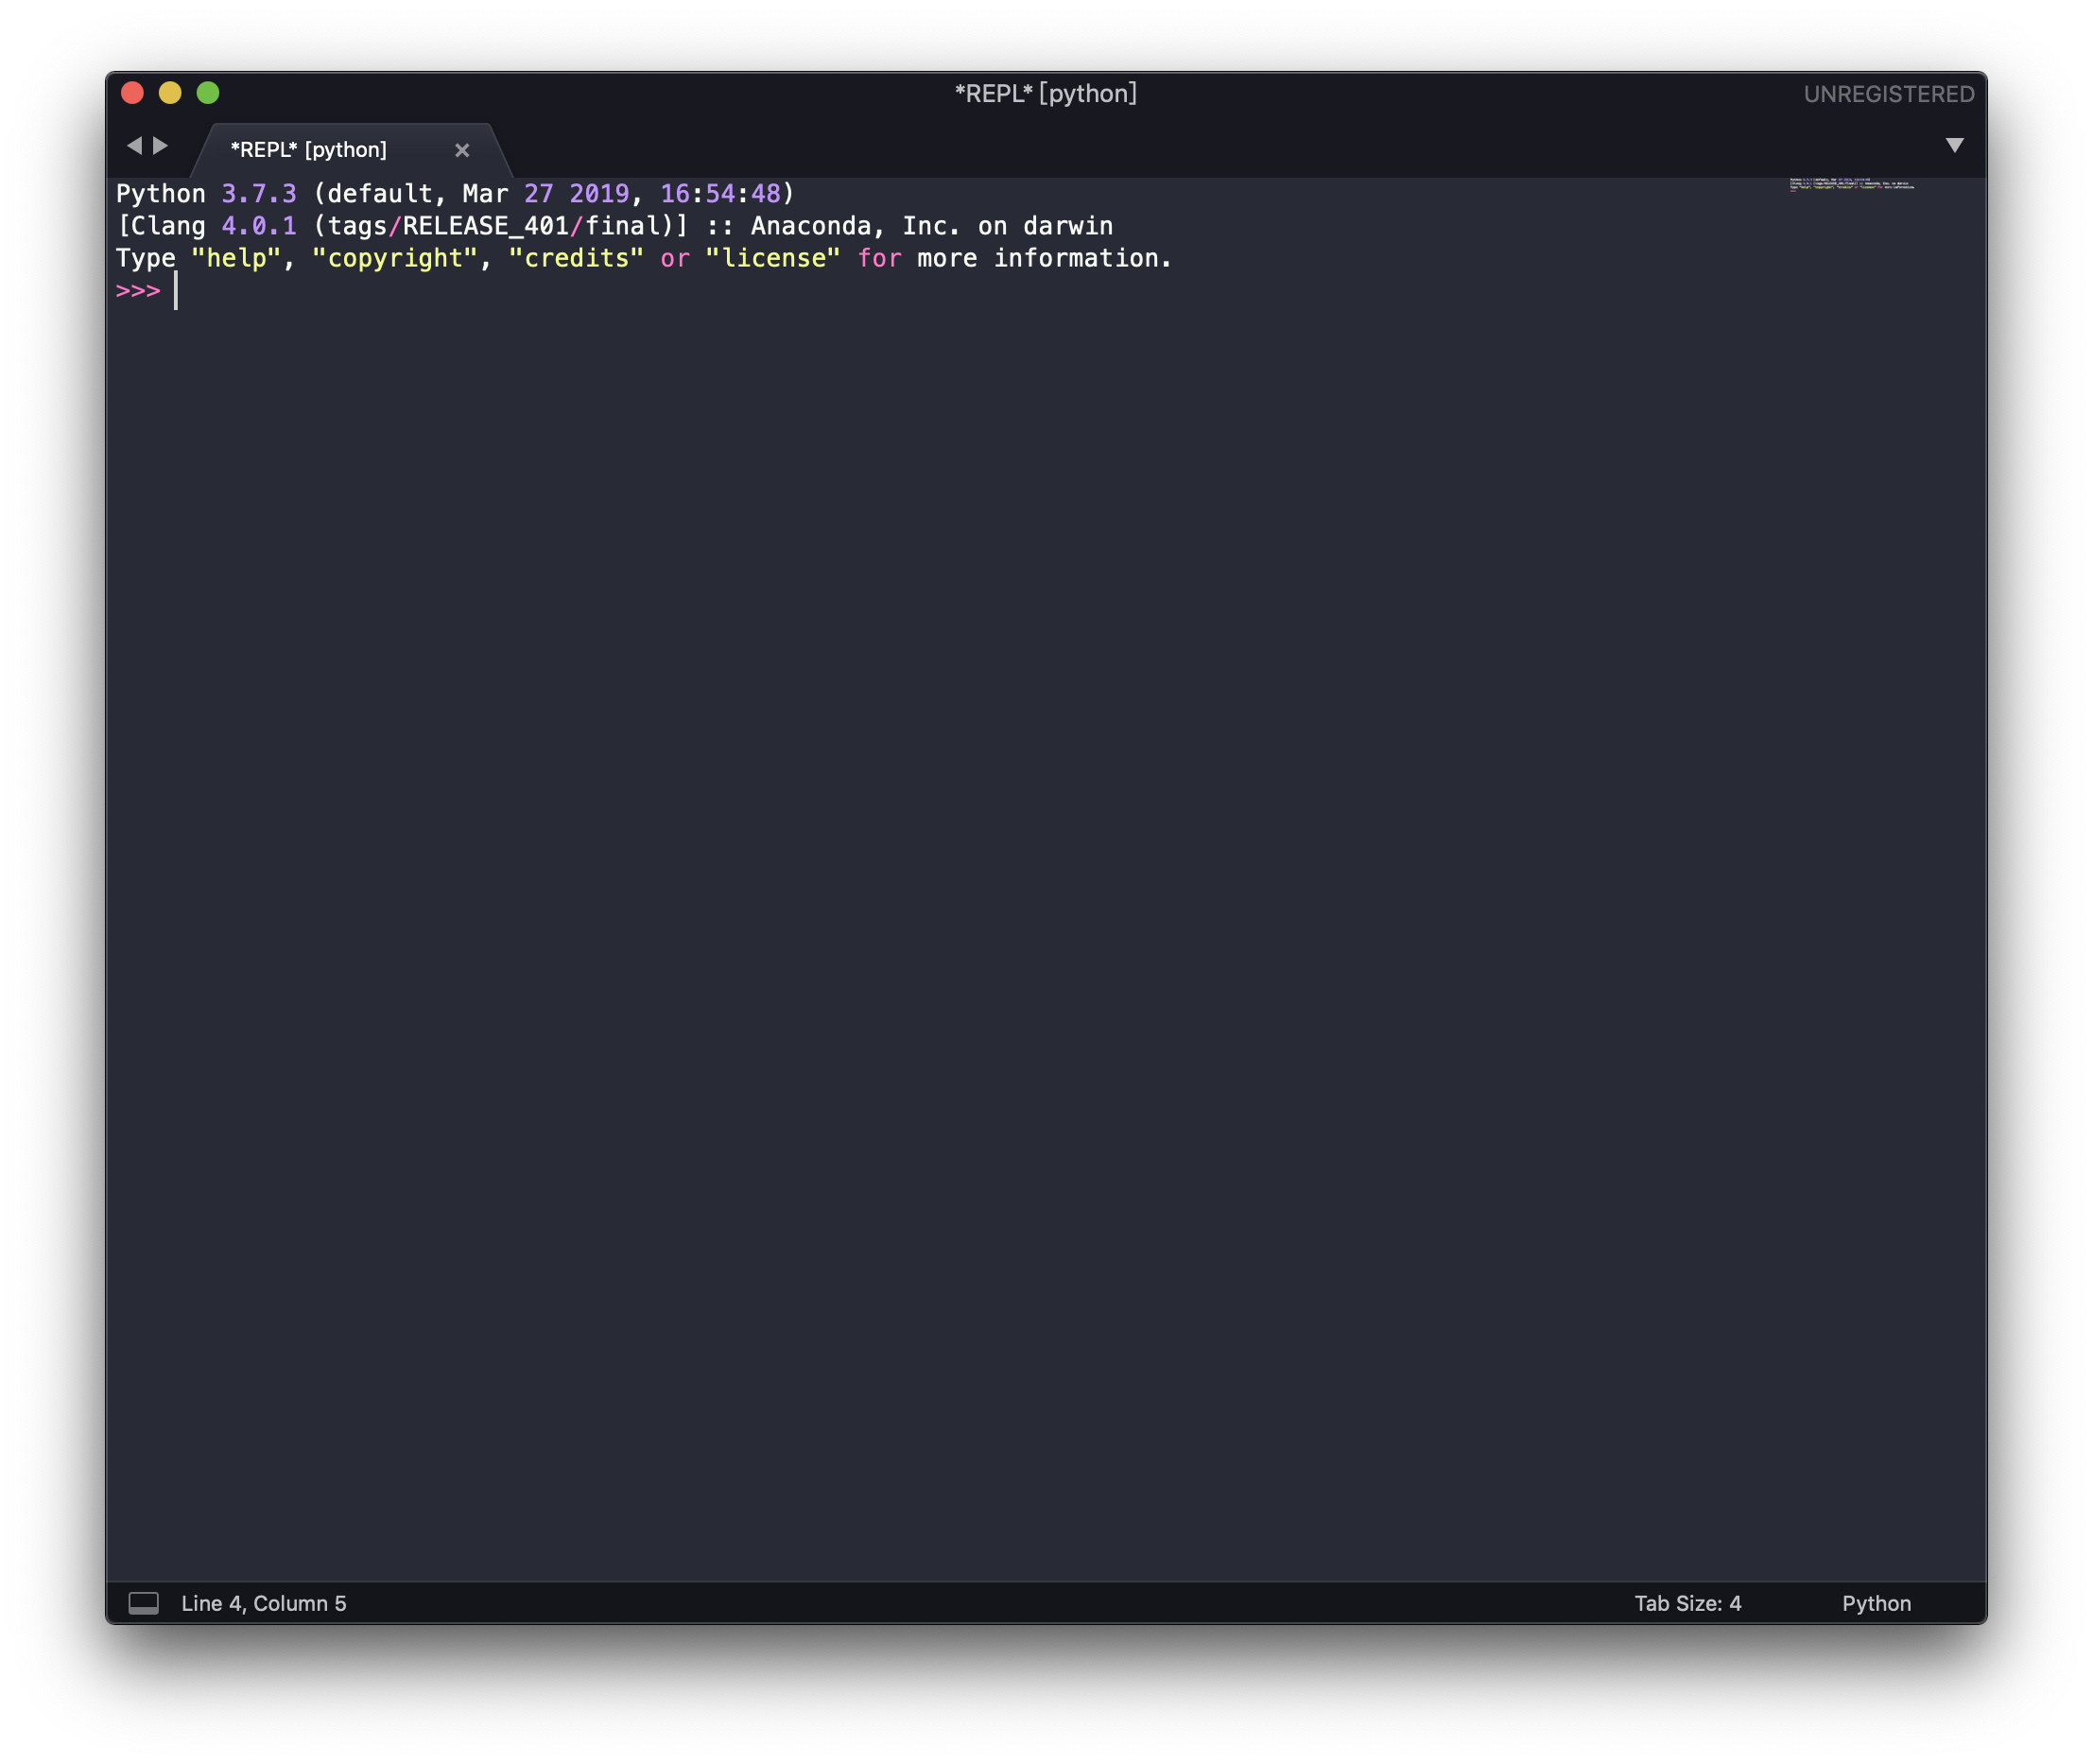
咦?怎么是 Python 2.7.10,不是 Python 3.x.x 呢?又上网搜索一下,发现原来 SublimeREPL 默认使用 macOS 自带的 Python 2.x.x 版本,需要手动修改为 Python 3.x.x。
于是前往 ~/Library/Application Support/Sublime Text 3/Packages/SublimeREPL/config/Python/Main.sublime-menu 打开 Main.sublime-menu 这个 .json 文件,将 cmd 命令下的 python 修改为 ~/anaconda3/bin/python(一定要包含路径!),一共有 4 处需要修改。
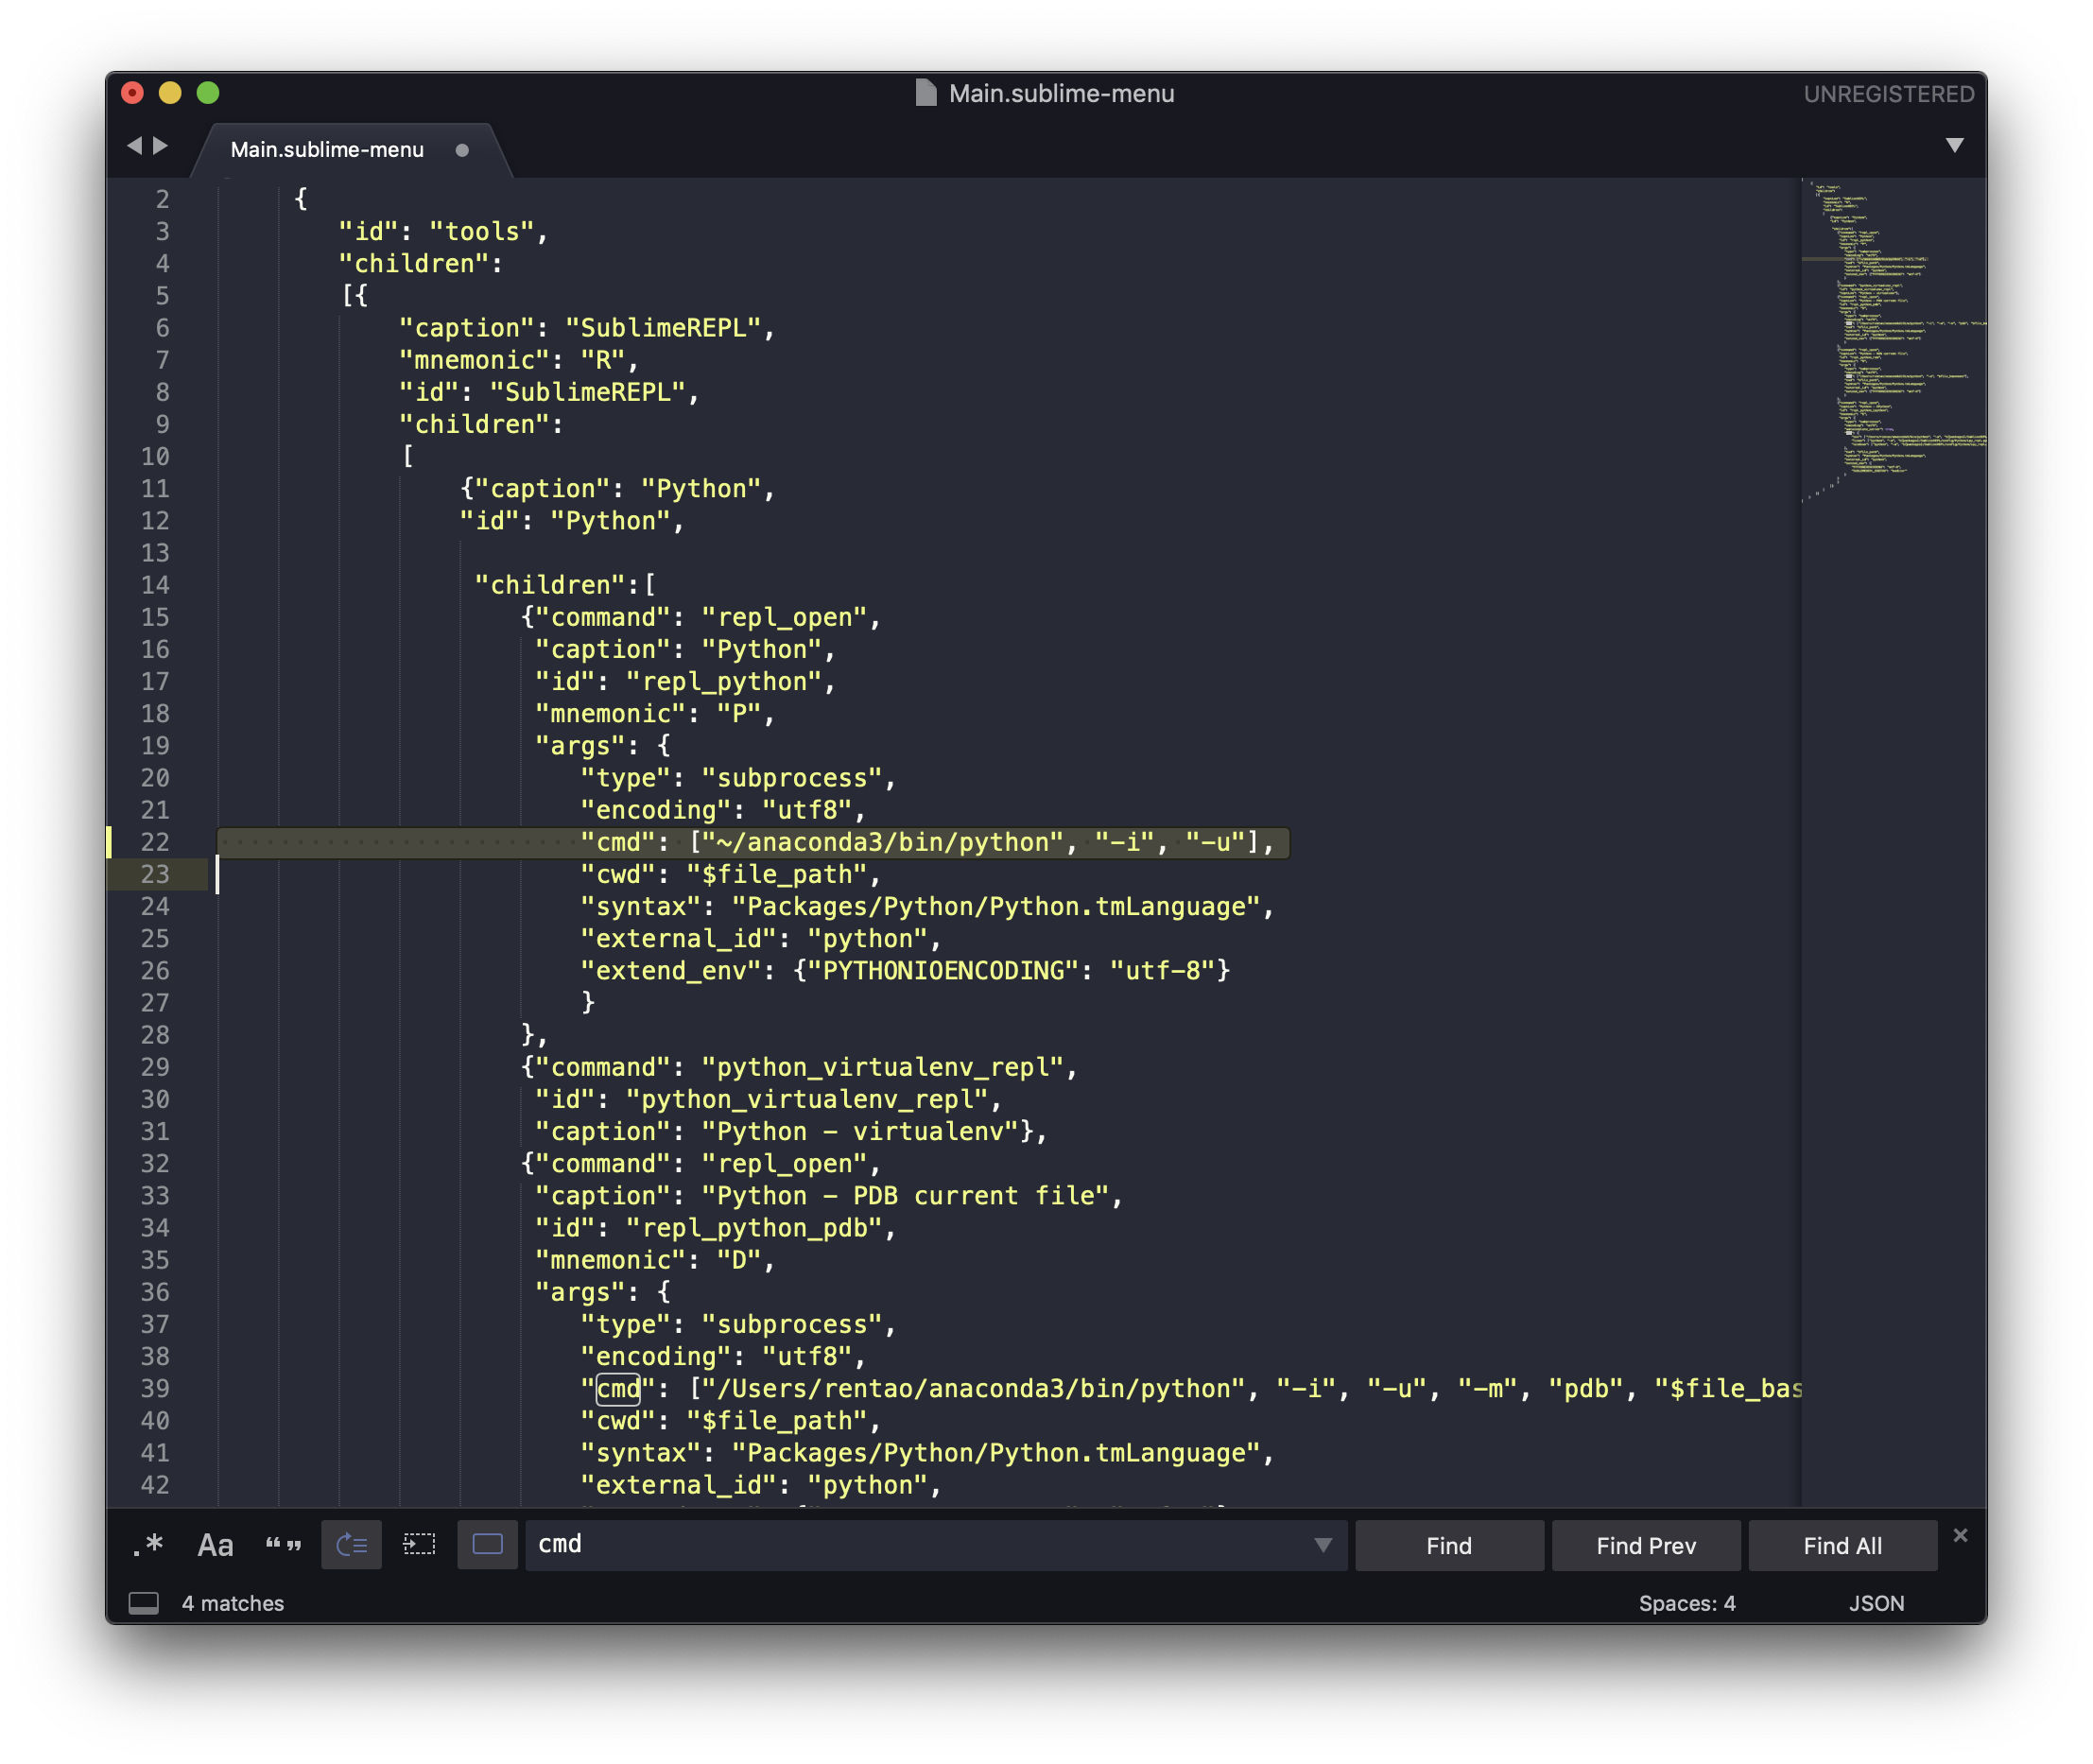
修改完保存之后,再来测试一下,Python 3.7.3!成功 ✌️
至此应该就算完整搞定了,但这只能体现标题的「生命不息,折腾不止」,接下来就是作死不断了 😂
# 作死不断
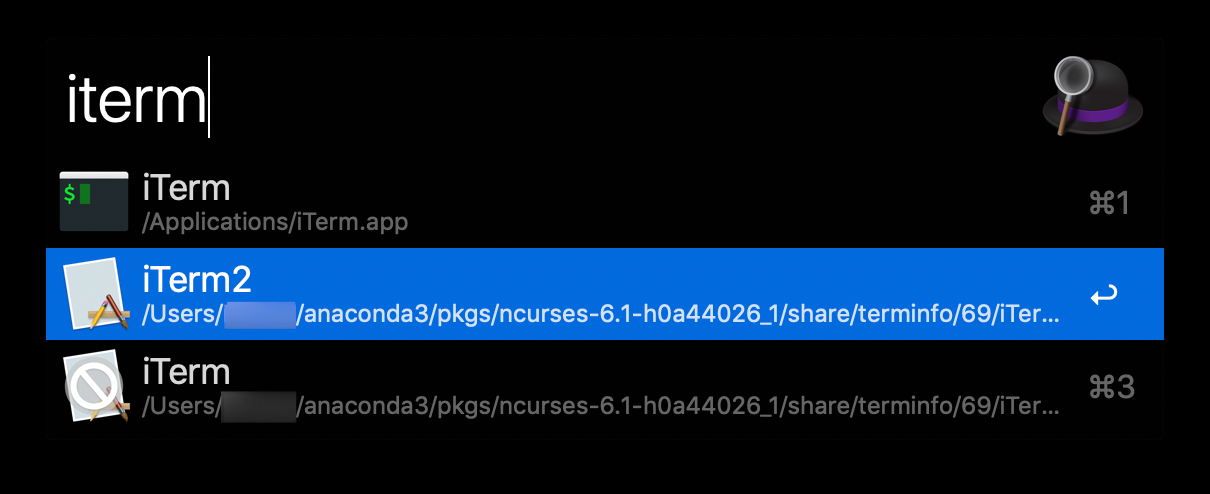
由于上面的 Anaconda 是安装在用户文件夹之下的,和桌面、下载、图片这些处于同一个文件夹下。系统对它的权限很高,比如 Alfred 就能搜索到这些文件。
而这些文件是不需要修改的,权限高造成容易被修改,引起不必要的麻烦。所以今天早上我就想把它弄到磁盘空间里去,直接移动肯定不行。
重装
那就重装吧!
记不起第几次去下载 Anaconda 安装包了,下载好之后,同样的双击打开并安装。与之前「仅为我安装」不同的是,这次选择「在特定的磁盘上安装」。
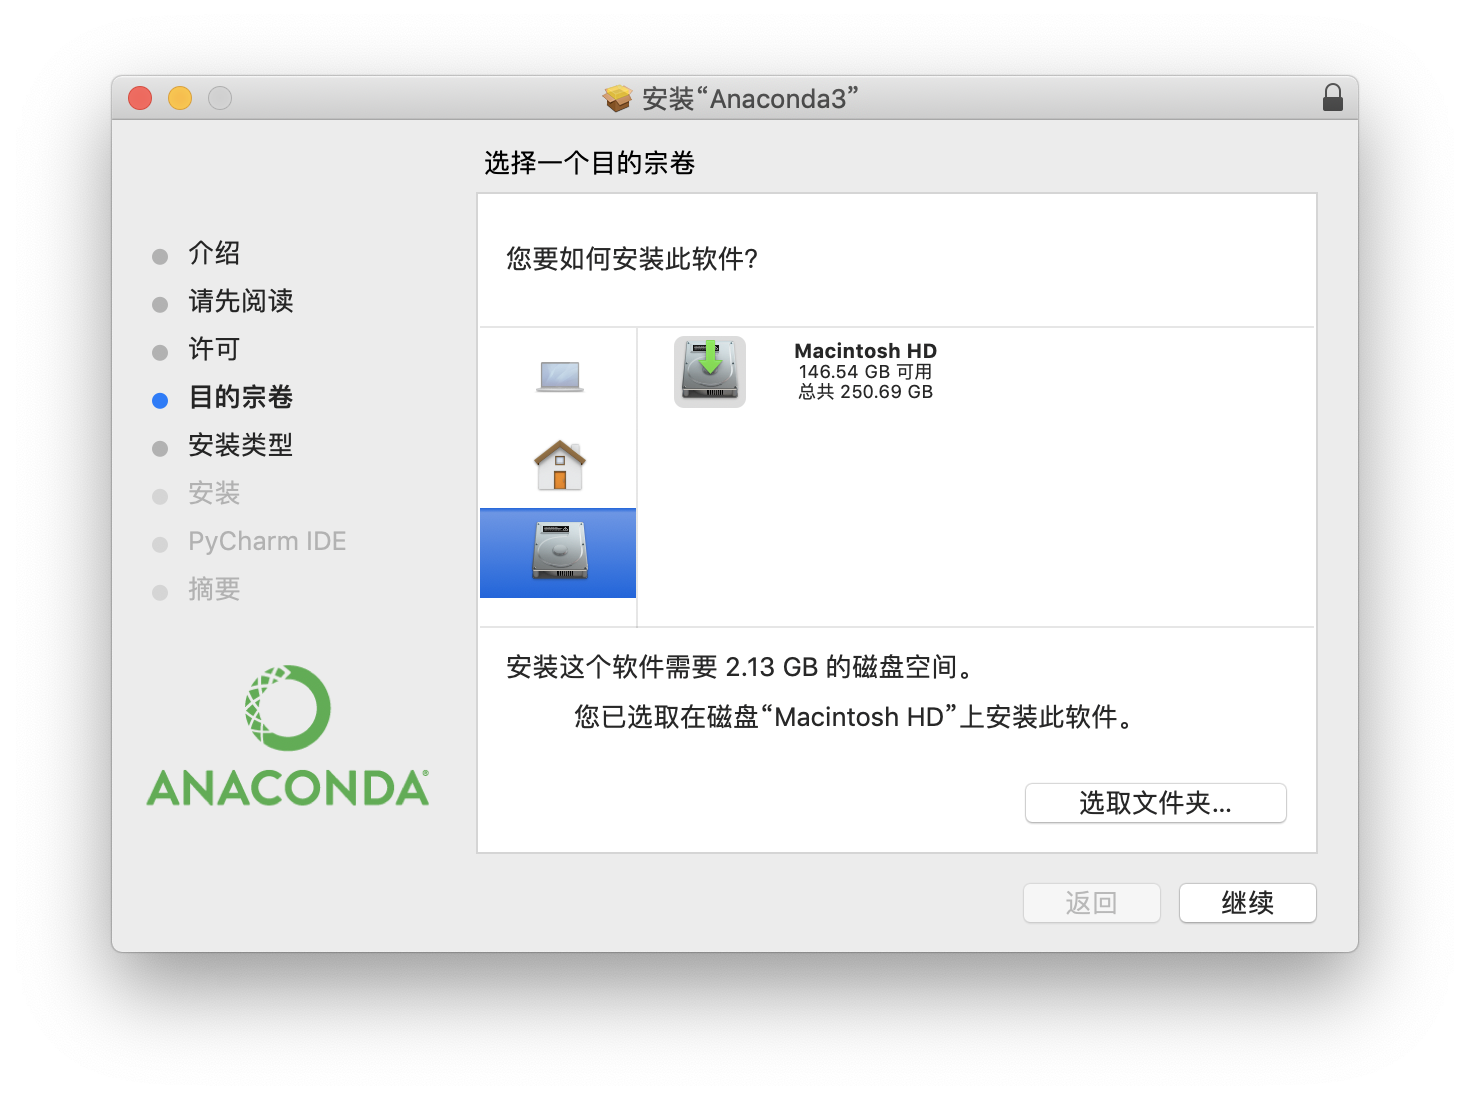
安装好之后,其实是和很久之前安装的 Anaconda 在同样的位置,只不过现在的版本更高一些。理论上按照之前的方法设置一下,应该是没有问题的,然而没有料到,又出幺蛾子了。。。
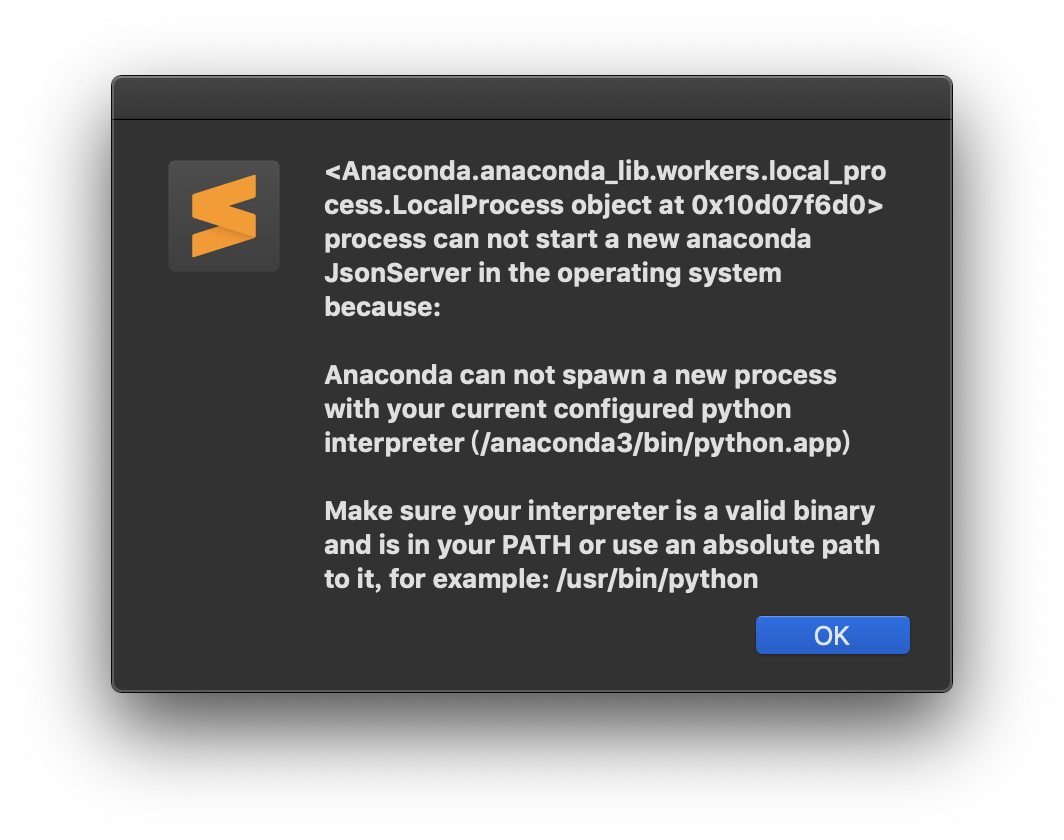
打开 Sublime Text 3 跳出这样一个界面。虽然代码可以正常运行,可是不能忍啊!Google 一下,在 anaconda 仓库这个 issue 中发现了解决办法。
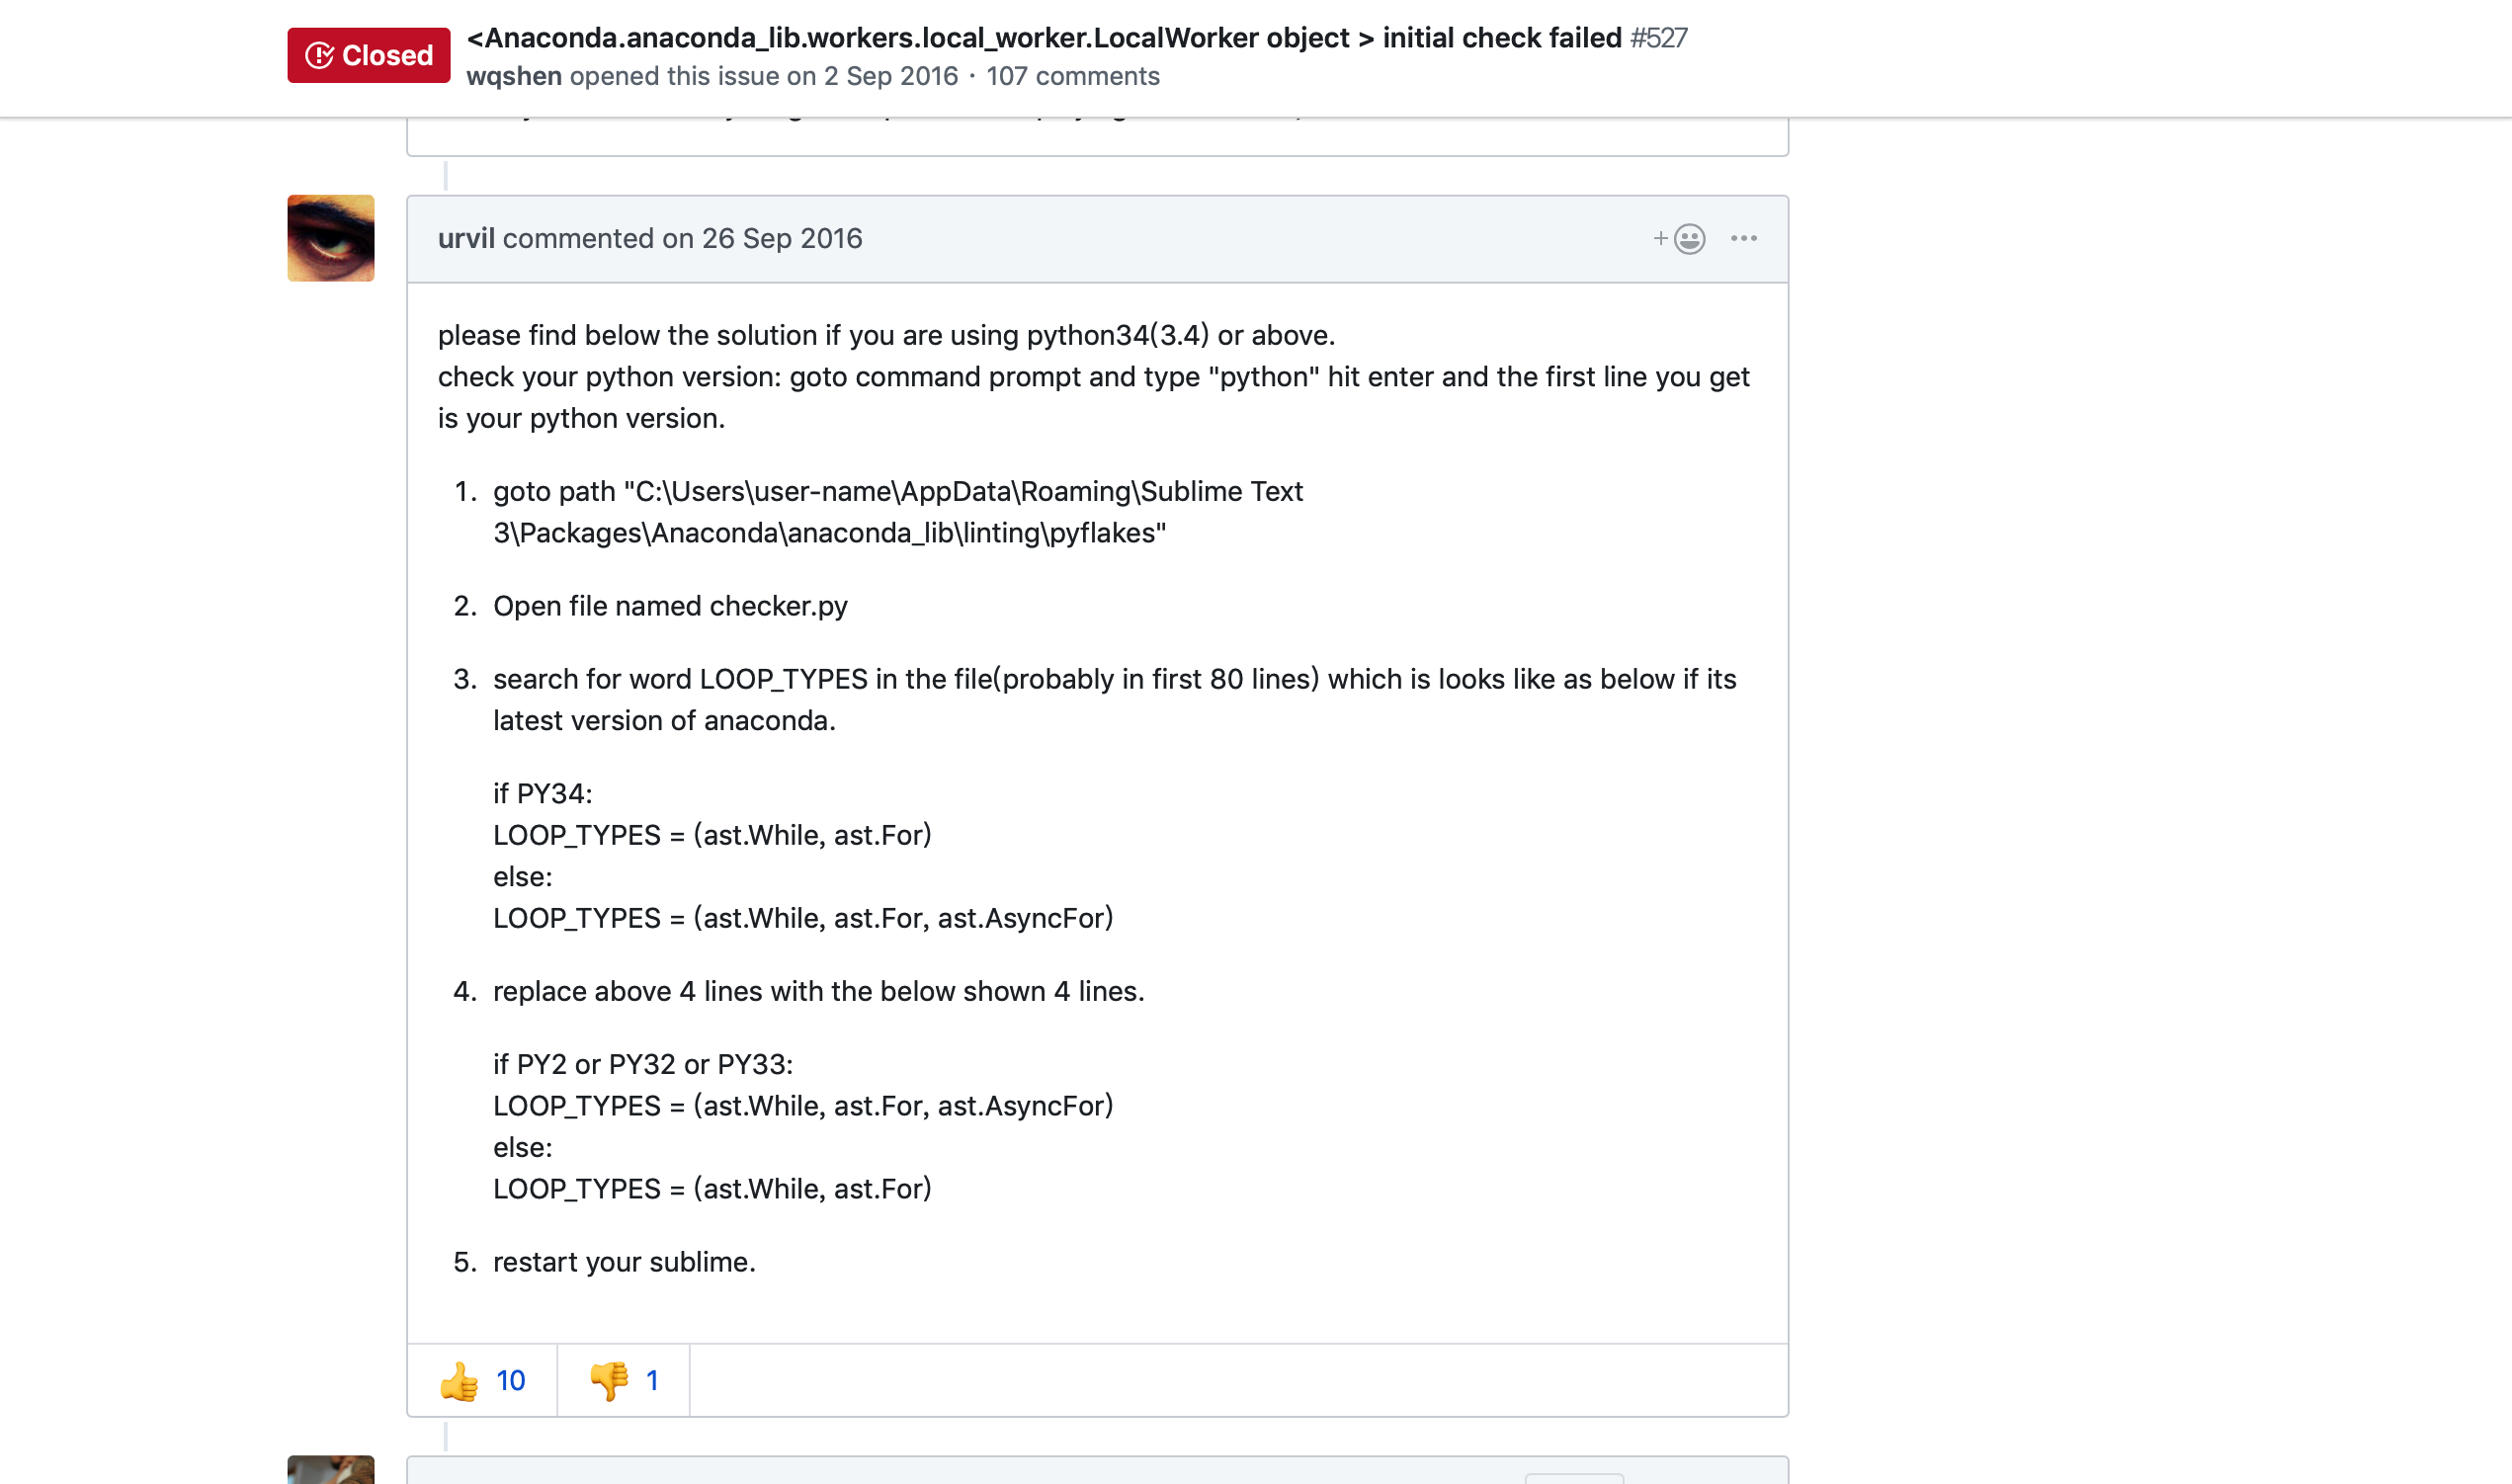
按照这个提示,前往 ~/Library/Application Support/Sublime Text 3/Packages/Anaconda/anaconda_lib/linting/pyflakes/checker.py 打开这个 checker.py 文件,发现和上面这个 issue 提到的有点不一样,多了几行。
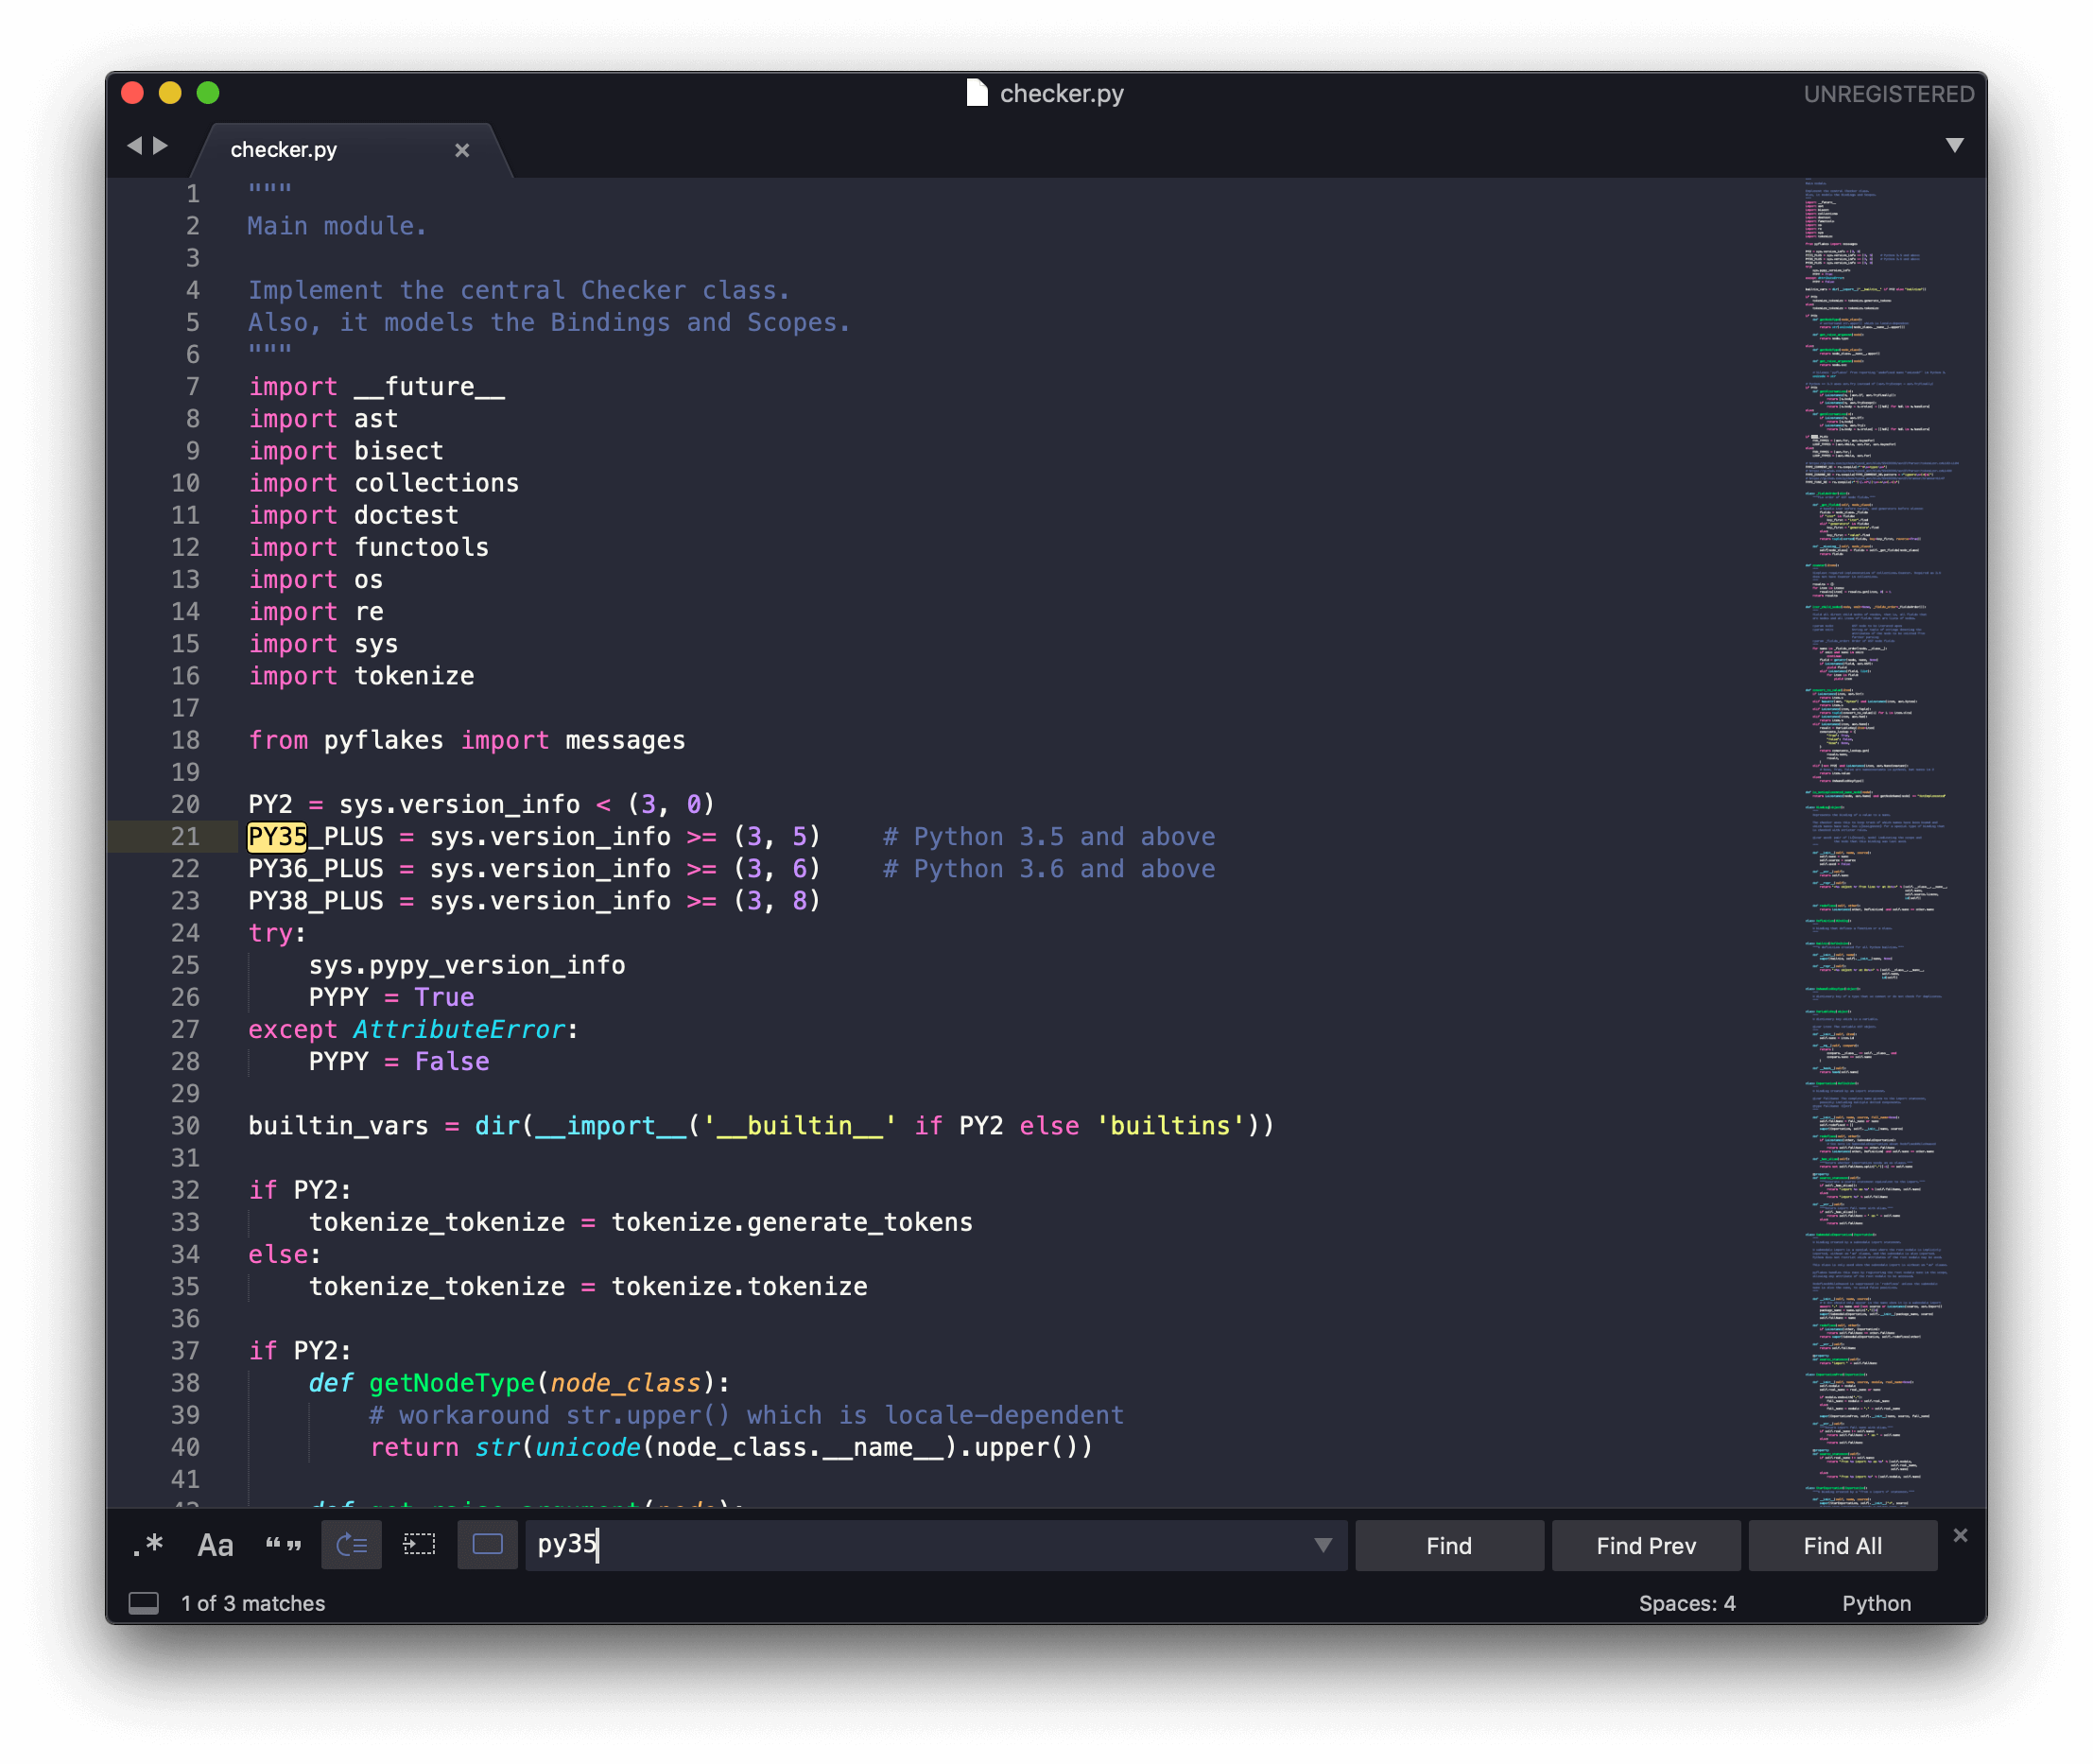
重装
算了,不改了,重装吧。
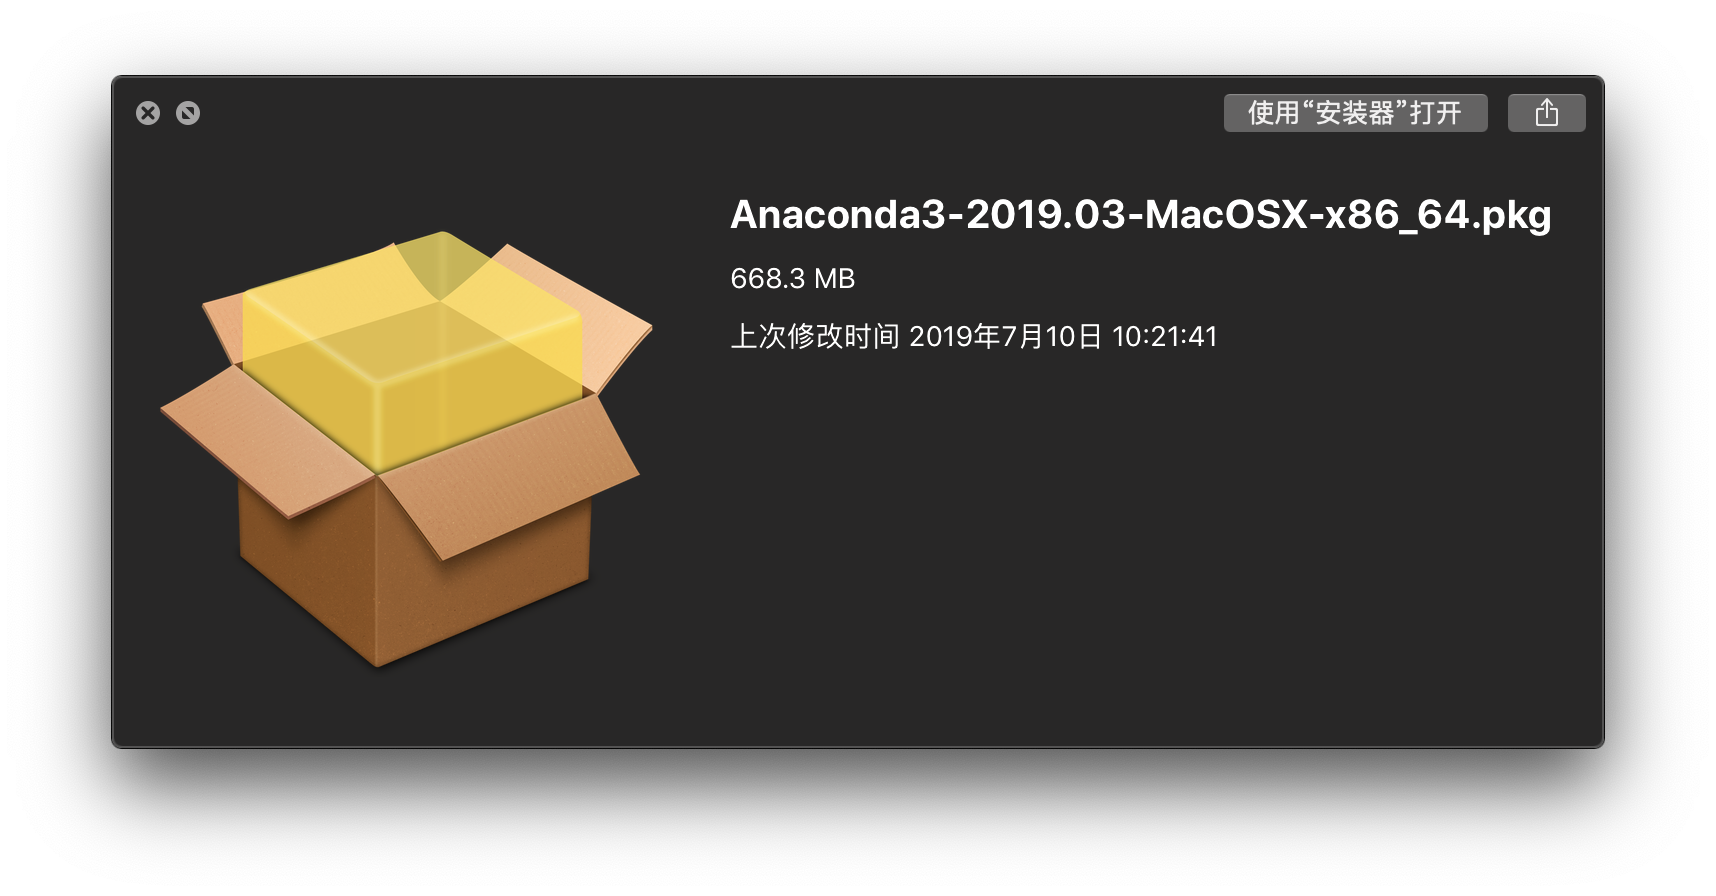
好吧,再一次(最后一次)重装 Anaconda,吸取之前的教训,没有删除安装包,就少了下载这一步,这个安装包我现在都舍不得删除了~
这次还是乖乖地选择「仅为我安装」,安装在用户文件夹下。幸运的是,这次终于成功了,不再有什么幺蛾子了。
运行一个程序,庆祝终于成功啦 ✌️
点击展开源代码
# Python 绘制小猪佩奇
from turtle import*
def nose(x,y):#鼻子
    penup()#提起笔
    goto(x,y)#定位
    pendown()#落笔,开始画
    setheading(-30)#将乌龟的方向设置为to_angle/为数字(0-东、90-北、180-西、270-南)
    begin_fill()#准备开始填充图形
    a=0.4
    for i in range(120):
        if 0<=i<30 or 60<=i<90:
            a=a+0.08
            left(3) #向左转3度
            forward(a) #向前走a的步长
        else:
            a=a-0.08
            left(3)
            forward(a)
    end_fill()#填充完成
    penup()
    setheading(90)
    forward(25)
    setheading(0)
    forward(10)
    pendown()
    pencolor(255,155,192)#画笔颜色
    setheading(10)
    begin_fill()
    circle(5)
    color(160,82,45)#返回或设置pencolor和fillcolor
    end_fill()
    penup()
    setheading(0)
    forward(20)
    pendown()
    pencolor(255,155,192)
    setheading(10)
    begin_fill()
    circle(5)
    color(160,82,45)
    end_fill()
def head(x,y):#头
    color((255,155,192),"pink")
    penup()
    goto(x,y)
    setheading(0)
    pendown()
    begin_fill()
    setheading(180)
    circle(300,-30)
    circle(100,-60)
    circle(80,-100)
    circle(150,-20)
    circle(60,-95)
    setheading(161)
    circle(-300,15)
    penup()
    goto(-100,100)
    pendown()
    setheading(-30)
    a=0.4
    for i in range(60):
        if 0<=i<30 or 60<=i<90:
            a=a+0.08
            lt(3) #向左转3度
            fd(a) #向前走a的步长
        else:
            a=a-0.08
            lt(3)
            fd(a)
    end_fill()
def ears(x,y): #耳朵
    color((255,155,192),"pink")
    penup()
    goto(x,y)
    pendown()
    begin_fill()
    setheading(100)
    circle(-50,50)
    circle(-10,120)
    circle(-50,54)
    end_fill()
    penup()
    setheading(90)
    forward(-12)
    setheading(0)
    forward(30)
    pendown()
    begin_fill()
    setheading(100)
    circle(-50,50)
    circle(-10,120)
    circle(-50,56)
    end_fill()
def eyes(x,y):#眼睛
    color((255,155,192),"white")
    penup()
    setheading(90)
    forward(-20)
    setheading(0)
    forward(-95)
    pendown()
    begin_fill()
    circle(15)
    end_fill()
    color("black")
    penup()
    setheading(90)
    forward(12)
    setheading(0)
    forward(-3)
    pendown()
    begin_fill()
    circle(3)
    end_fill()
    color((255,155,192),"white")
    penup()
    seth(90)
    forward(-25)
    seth(0)
    forward(40)
    pendown()
    begin_fill()
    circle(15)
    end_fill()
    color("black")
    penup()
    setheading(90)
    forward(12)
    setheading(0)
    forward(-3)
    pendown()
    begin_fill()
    circle(3)
    end_fill()
def cheek(x,y):#腮
    color((255,155,192))
    penup()
    goto(x,y)
    pendown()
    setheading(0)
    begin_fill()
    circle(30)
    end_fill()
def mouth(x,y): #嘴
    color(239,69,19)
    penup()
    goto(x,y)
    pendown()
    setheading(-80)
    circle(30,40)
    circle(40,80)
def body(x,y):#身体
    color("red",(255,99,71))
    penup()
    goto(x,y)
    pendown()
    begin_fill()
    setheading(-130)
    circle(100,10)
    circle(300,30)
    setheading(0)
    forward(230)
    setheading(90)
    circle(300,30)
    circle(100,3)
    color((255,155,192),(255,100,100))
    setheading(-135)
    circle(-80,63)
    circle(-150,24)
    end_fill()
def hands(x,y):#手
    color((255,155,192))
    penup()
    goto(x,y)
    pendown()
    setheading(-160)
    circle(300,15)
    penup()
    setheading(90)
    forward(15)
    setheading(0)
    forward(0)
    pendown()
    setheading(-10)
    circle(-20,90)
    penup()
    setheading(90)
    forward(30)
    setheading(0)
    forward(237)
    pendown()
    setheading(-20)
    circle(-300,15)
    penup()
    setheading(90)
    forward(20)
    setheading(0)
    forward(0)
    pendown()
    setheading(-170)
    circle(20,90)
def foot(x,y):#脚
    pensize(10)
    color((240,128,128))
    penup()
    goto(x,y)
    pendown()
    setheading(-90)
    forward(40)
    setheading(-180)
    color("black")
    pensize(15)
    fd(20)
    pensize(10)
    color((240,128,128))
    penup()
    setheading(90)
    forward(40)
    setheading(0)
    forward(90)
    pendown()
    setheading(-90)
    forward(40)
    setheading(-180)
    color("black")
    pensize(15)
    fd(20)
def tail(x,y):#尾巴
    pensize(4)
    color((255,155,192))
    penup()
    goto(x,y)
    pendown()
    seth(0)
    circle(70,20)
    circle(10,330)
    circle(70,30)
def setting():          #参数设置
    pensize(4)
    hideturtle()        #使乌龟无形(隐藏)
    colormode(255)      #将其设置为1.0或255.随后 颜色三元组的r,g,b值必须在0 .. cmode范围内
    color((255,155,192),"pink")
    setup(840,500)
    speed(10)
def main():
    setting()           #画布、画笔设置
    nose(-100,100)      #鼻子
    head(-69,167)       #头
    ears(0,160)         #耳朵
    eyes(0,140)         #眼睛
    cheek(80,10)        #腮
    mouth(-20,30)       #嘴
    body(-32,-8)        #身体
    hands(-56,-45)      #手
    foot(2,-177)        #脚
    tail(148,-155)      #尾巴
    done()
if __name__ == '__main__':
	main()
2
3
4
5
6
7
8
9
10
11
12
13
14
15
16
17
18
19
20
21
22
23
24
25
26
27
28
29
30
31
32
33
34
35
36
37
38
39
40
41
42
43
44
45
46
47
48
49
50
51
52
53
54
55
56
57
58
59
60
61
62
63
64
65
66
67
68
69
70
71
72
73
74
75
76
77
78
79
80
81
82
83
84
85
86
87
88
89
90
91
92
93
94
95
96
97
98
99
100
101
102
103
104
105
106
107
108
109
110
111
112
113
114
115
116
117
118
119
120
121
122
123
124
125
126
127
128
129
130
131
132
133
134
135
136
137
138
139
140
141
142
143
144
145
146
147
148
149
150
151
152
153
154
155
156
157
158
159
160
161
162
163
164
165
166
167
168
169
170
171
172
173
174
175
176
177
178
179
180
181
182
183
184
185
186
187
188
189
190
191
192
193
194
195
196
197
198
199
200
201
202
203
204
205
206
207
208
209
210
211
212
213
214
215
216
217
218
219
220
221
222
223
224
225
226
227
228
229
230
231
232
233
234
235
236
237
238
239
240
241
242
243
244
245
246
247
248
249
250
251
252
253
254
255
256
257
258
259
260
261
262
263
264
265
266
267
268
269
270
271
272
273
274
275
276
277
278
279
280
281
282
283
284
285
286
287
几点搜索的体会:
TIP
- 善用搜索,绝大部分问题都能依靠搜索解决
- 有条件尽量使用 Google,不用或少用百度搜索引擎
- 多用英语搜索,一般比中文更有效
综上,总结一下:
总结
捣鼓了这么久,还是作业太少 😅
不要瞎折腾!
我们重装 macOS Catalina 吧~ (逃 🌚